Dualboot with Windows
It is possible to install ParrotOS alongside Windows, thanks to GRUB and correct partitioning.
Disable Secure Boot and CSM in your machine's UEFI settings.
After following the steps in the Parrot Installation guide up to the partitioning section, the situation will look similar to this:
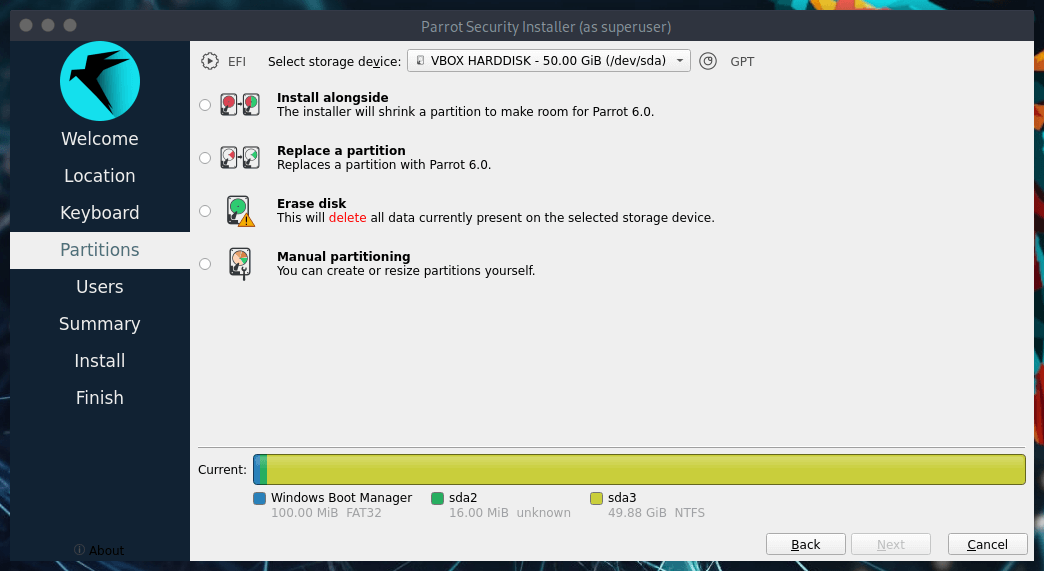
There are two ways to proceed:
Method 1: Automated Partitioning
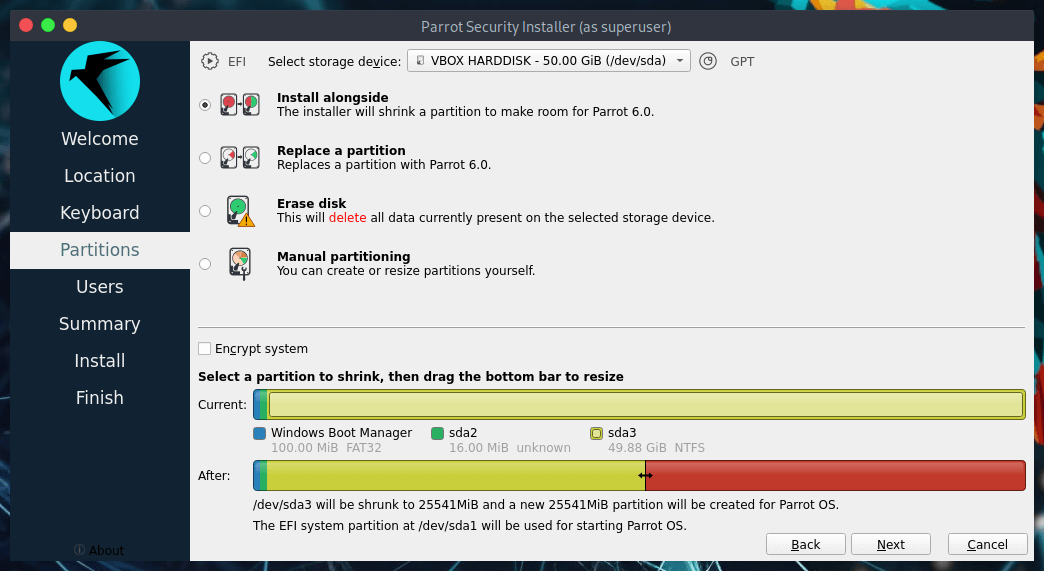
This is the easiest method. You simply verify that Install alongside is selected, choose the correct drive (e.g., /dev/sda3) from the dropdown menu, and drag the bottom slider to assign the desired amount of space for ParrotOS. Then click on Next to proceed.
Method 2: Manual Partitioning
This method gives you the freedom to choose the exact amount of space and the number of partitions for ParrotOS.
NOTE: The Security edition needs at least 40GB of space, while the Home edition needs at least 20GB. In this guide, we are not creating a Swap partition as it is optional on modern systems with SSDs.
Select Manual Partitioning and click on Next.

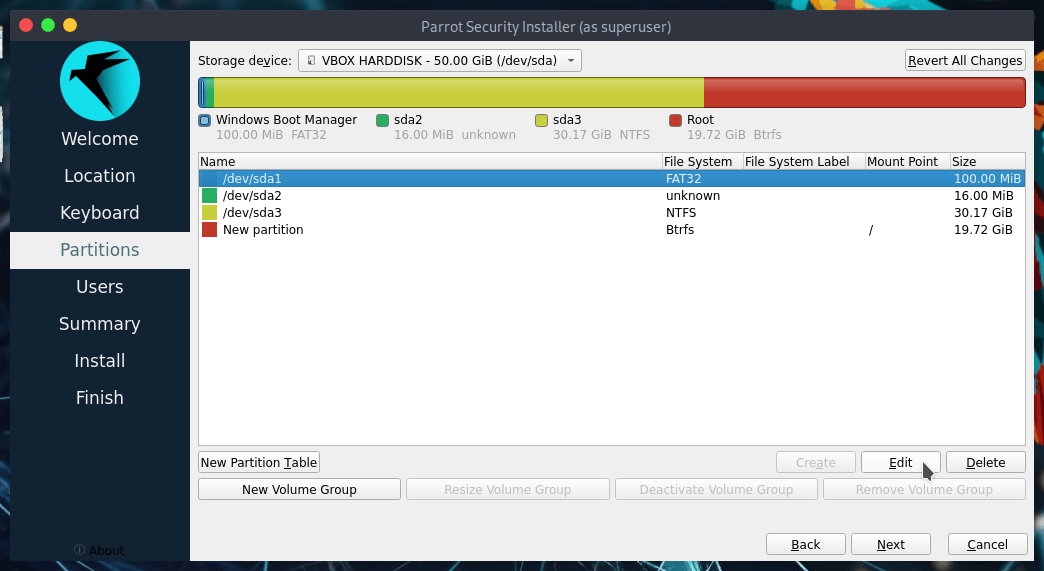
You will see something similar to this:
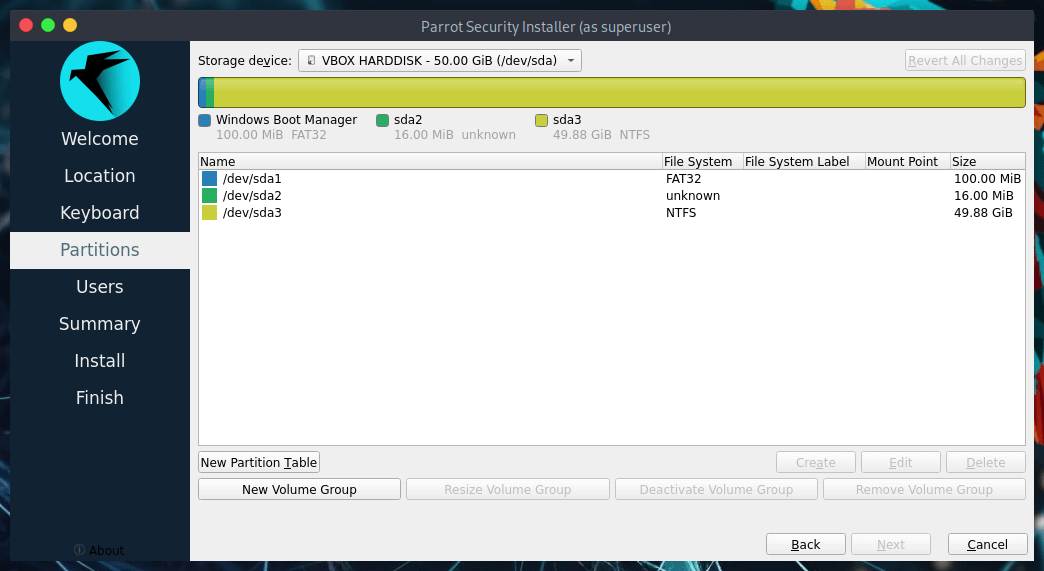
In detail:
- /dev/sda1 is the boot partition (EFI).
- /dev/sda2 is the MSR (Microsoft Reserved partition).
- /dev/sda3 is where Windows is installed.
- /dev/sda4 is a recovery partition.
This is a standard Windows partition layout. Select the main Windows partition (e.g., /dev/sda3) and click on Edit.
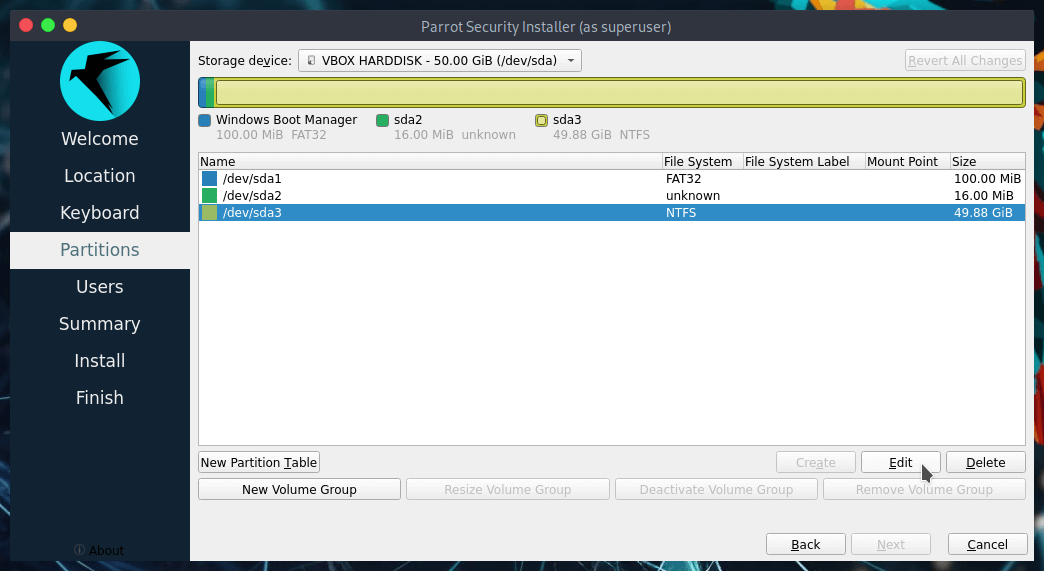
This window will open:
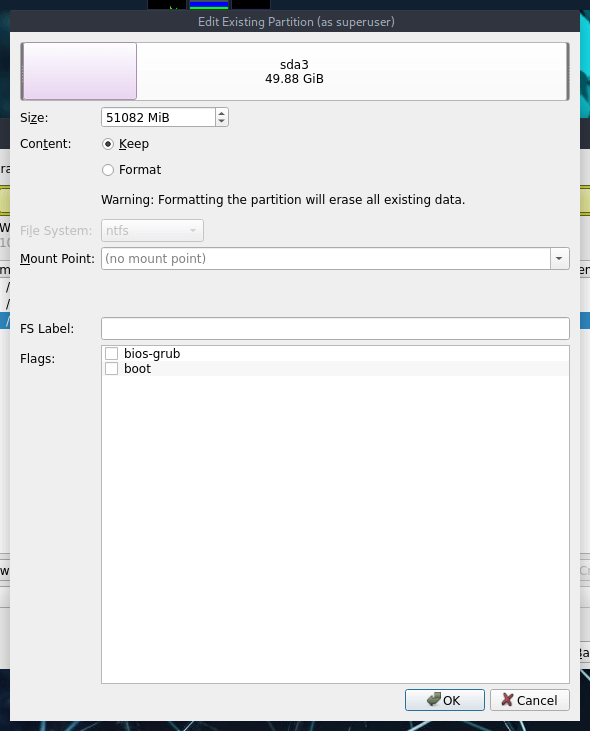
Here you can shrink/resize partitions (by dragging the bar or entering the size in MiB), and set flags and mount points.
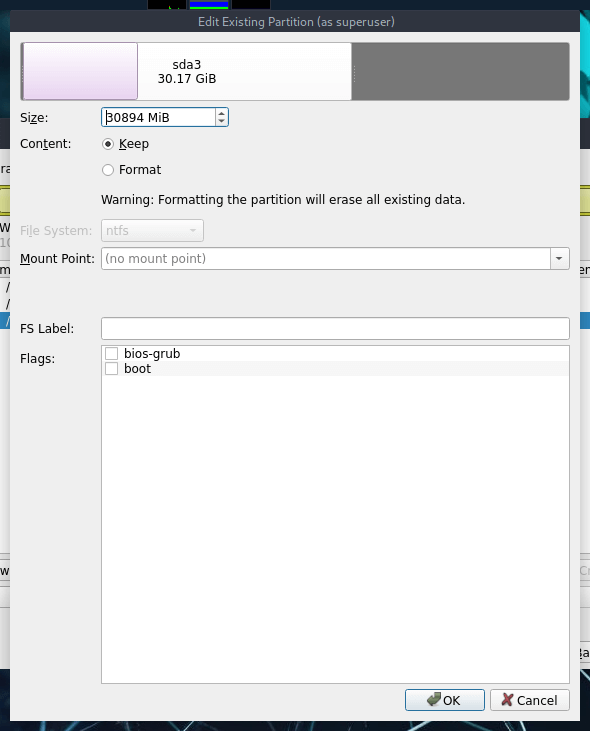
Drag the bar or set the value to free up the desired space (in this example, we resized Windows to 40GB, leaving 20GB of unallocated space for ParrotOS), then click on OK.
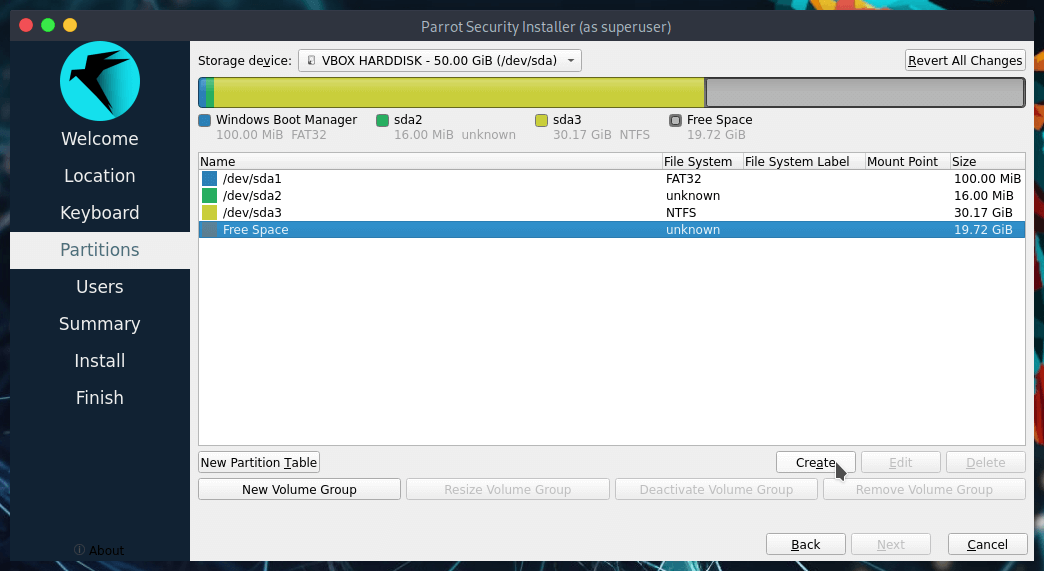
Now you will see the updated layout. Select the new Unallocated space and click on Create:
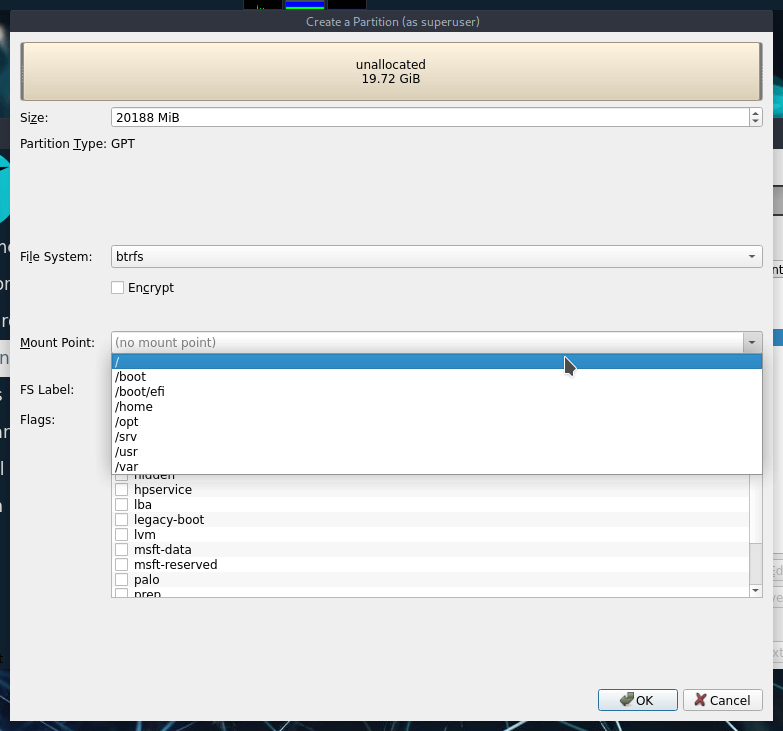
Configure the new partition settings. Choose your file system (ParrotOS defaults to BTRFS) and set the mount point to / (root). Then click on OK:
Finally, set up the boot partition.
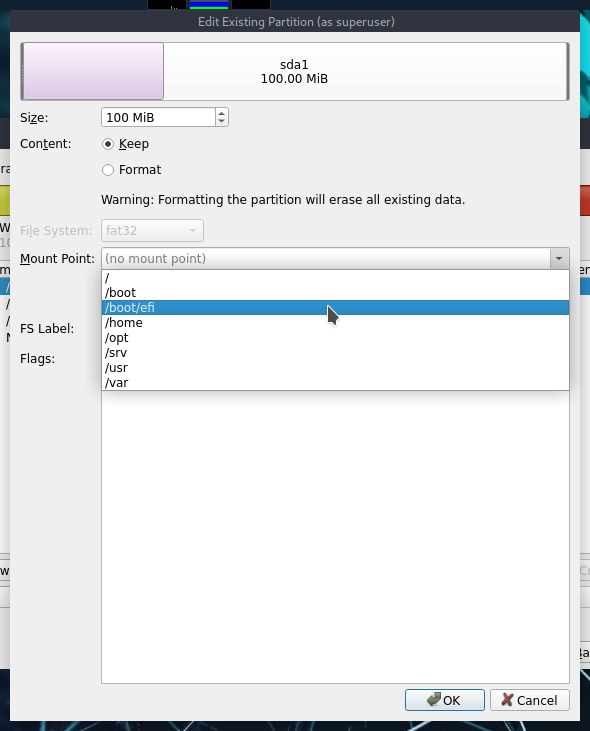
Select the EFI partition (e.g., /dev/sda1) and click on Edit:
Set the mount point to /boot/efi (do not format this partition!) and click on OK:
This is the final layout. Proceed with the installation by clicking on Next:
