Manual Partitioning
This guide focuses on the Manual Partitioning of ParrotOS using the Calamares installer. This method provides full control over disk management, allowing you to define partition sizes, file systems, and mount points according to your specific needs.
Similar to the Dualboot with Windows guide, this approach allows for custom configurations.
We will cover two common use cases:
Case 1: Partitioning a disk with existing partitions
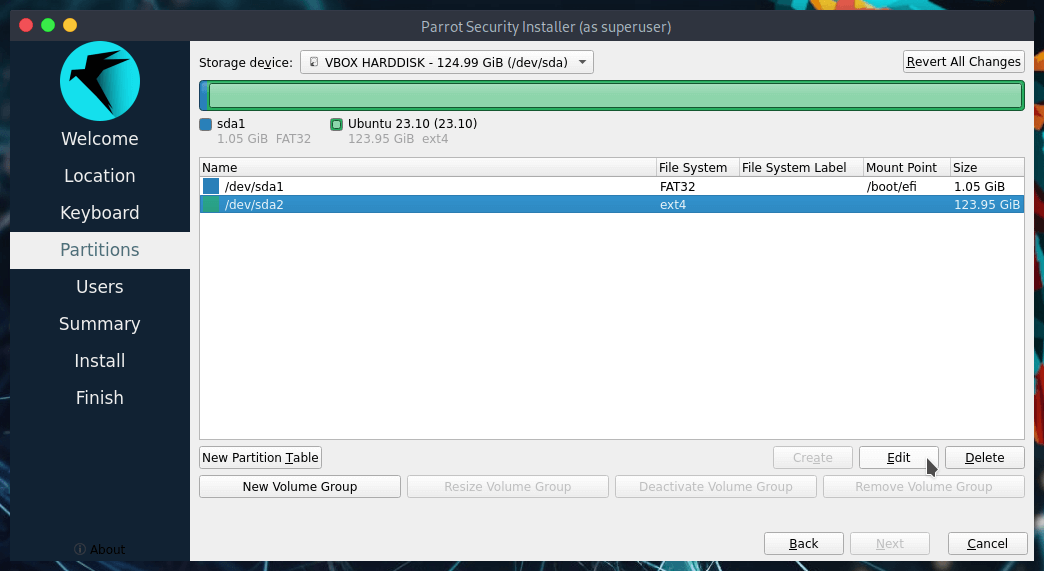
After following the initial Parrot Installation steps, select Manual Partitioning and click Next.
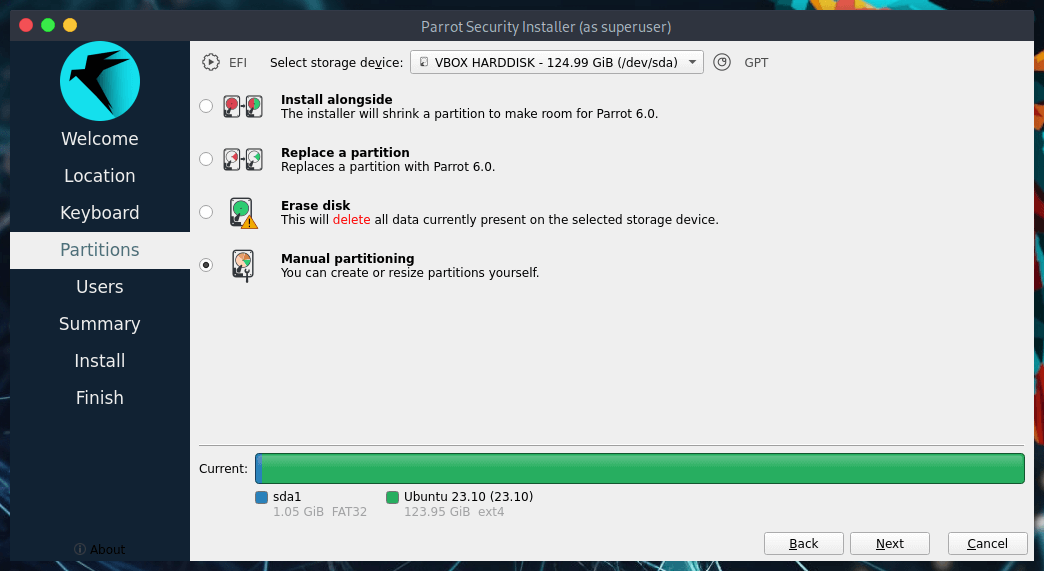
You will see a disk layout similar to this:
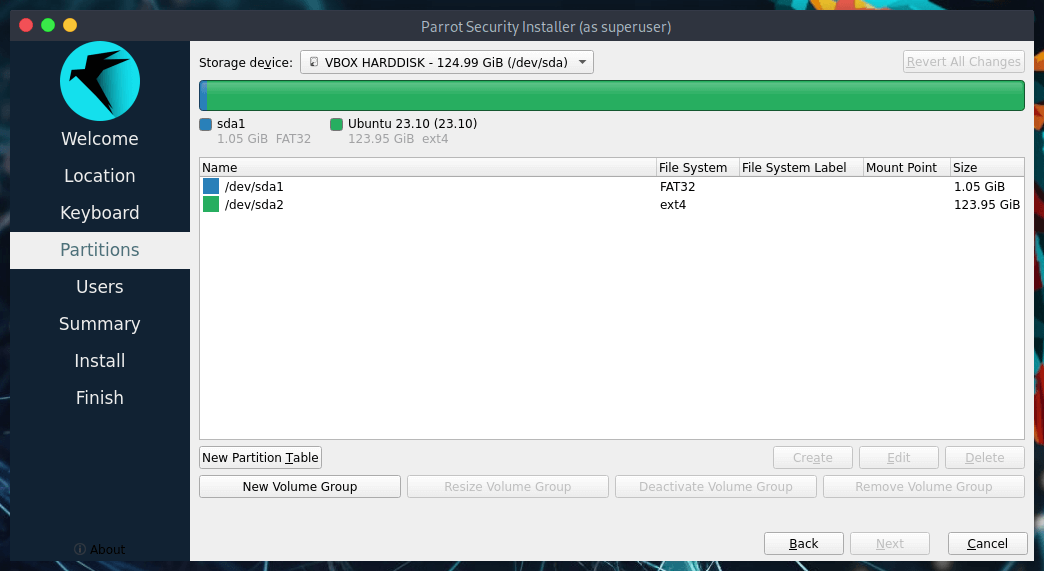
Partition breakdown:
/dev/sda1: The partition containing EFI boot files./dev/sda2: The partition containing the existing Operating System (e.g., Windows).
To run ParrotOS on a UEFI system, at least three partitions are required:
/boot/EFI- The partition containing the EFI firmware files necessary to boot the system./- The root partition containing the entire operating system./home- The partition dedicated to user data.
Ensure that Secure Boot and CSM (Compatibility Support Module) are disabled in your machine's UEFI settings before proceeding with the operations described below.
For a standard Legacy BIOS environment, at least two partitions are needed:
//home
Resizing and Configuring Partitions
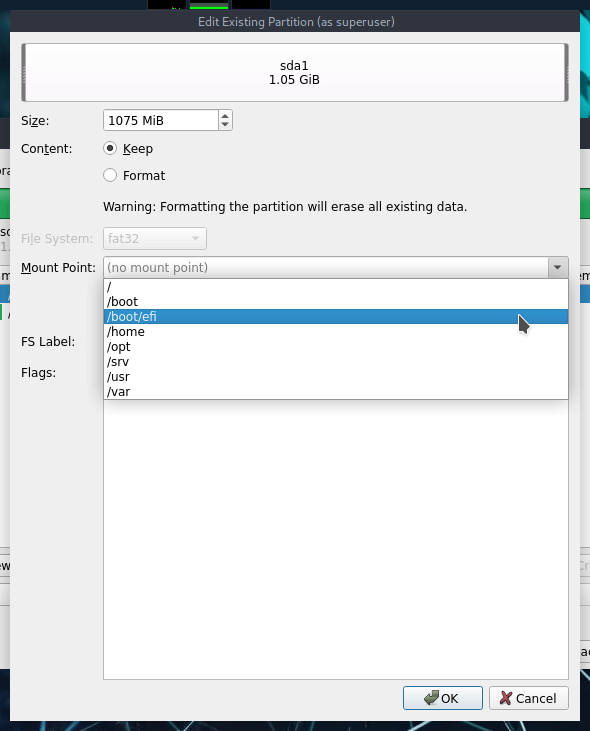
First, we need to adjust the existing partitions to make space. Select /dev/sda1 and click Edit.
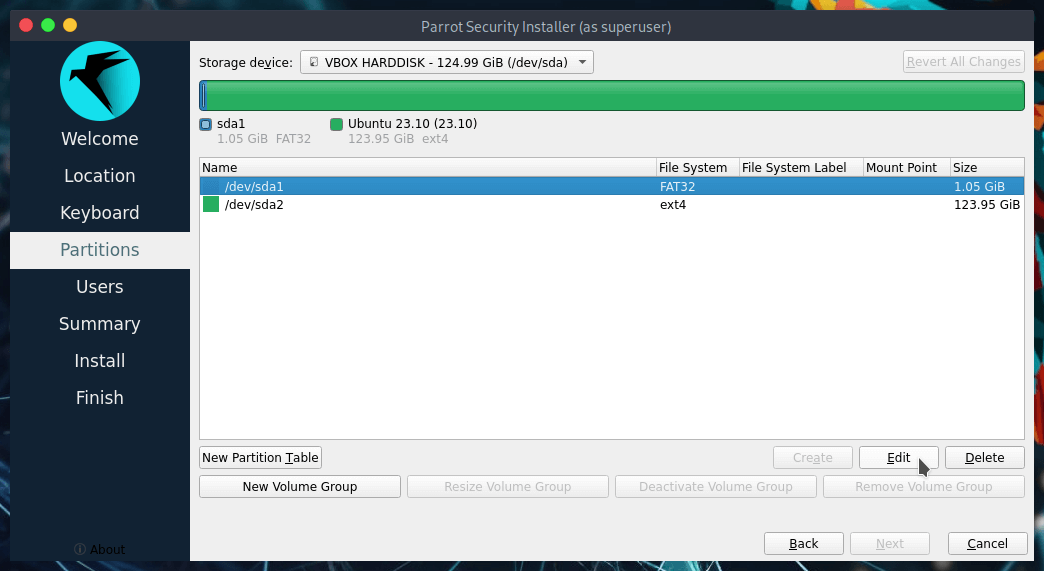
In this window, you can shrink/resize partitions, set flags, and define mount points. Set up the partition as shown below, then click OK.
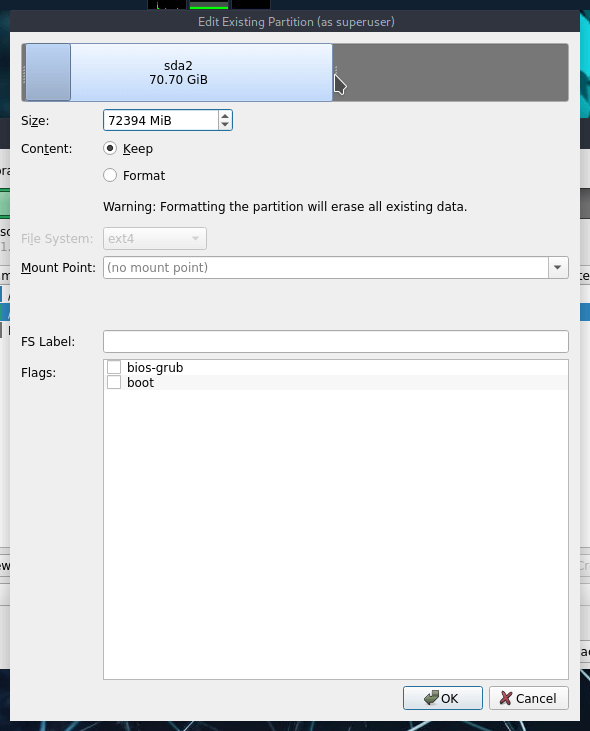
Next, select the existing OS partition (e.g., /dev/sda2) and click Edit.
Drag the bar or enter a specific value to resize the partition. In this example, the total disk size is about 124GB. We allocated roughly 70GB to Windows, leaving approximately 50GB for ParrotOS.
Click OK when finished.
Storage Requirements:
- Parrot Home Edition: At least 20GB.
- Parrot Security Edition: At least 40GB.
- This guide demonstrates the installation of the Home Edition.
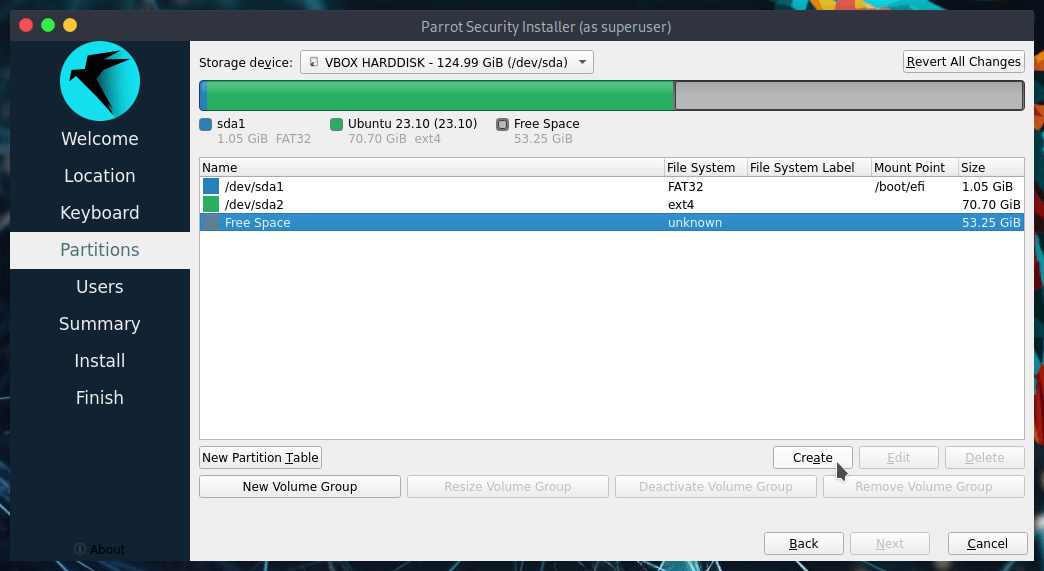
Creating New Partitions
Select the newly created Free Space and click Create.
1. Create the Root Partition (/)
Set it up as shown in the image below and click OK:
2. Create the Home Partition (/home)
Select the remaining Free Space and click Create:
Set it up as shown below and click OK:
Once all partitions are properly configured, proceed with the installation by clicking Next.
Follow the remaining on-screen instructions to complete the installation.
Case 2: Partitioning an empty disk
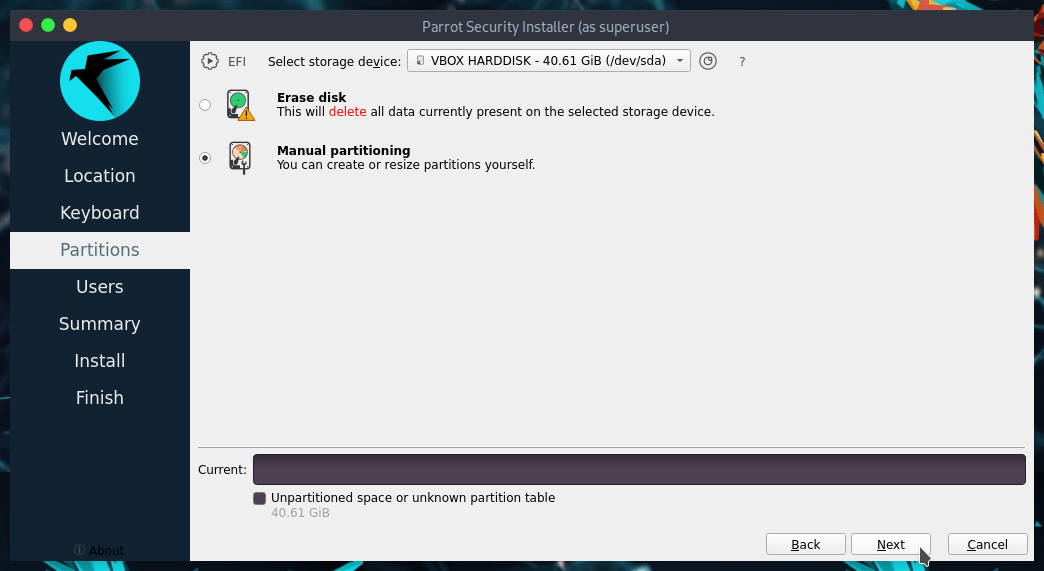
After following the initial Parrot Installation steps, select Manual Partitioning and click Next.
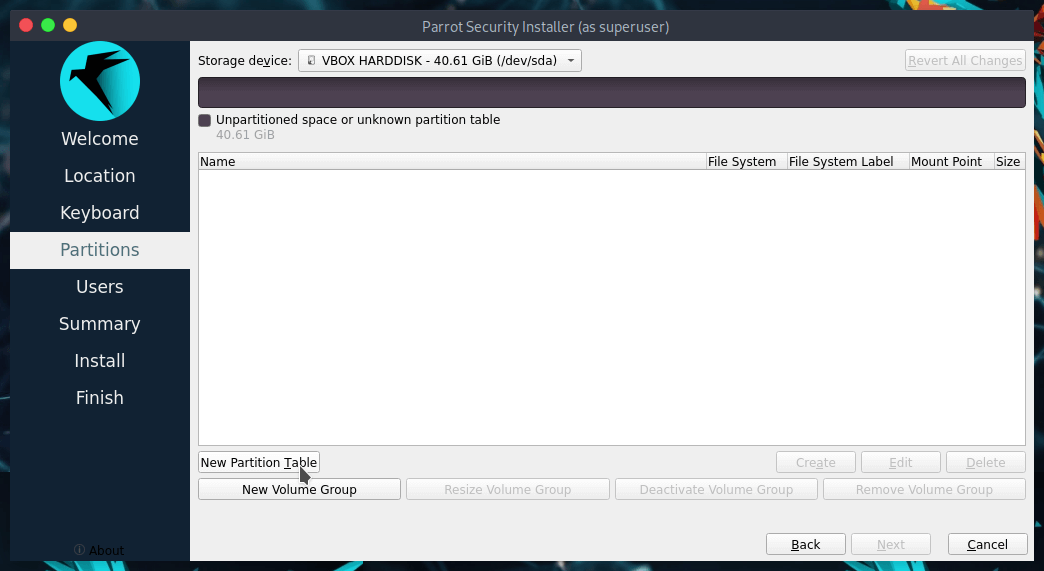
Since the hard drive is empty, the space will appear as unallocated. Create a new partition table by clicking New Partition Table.
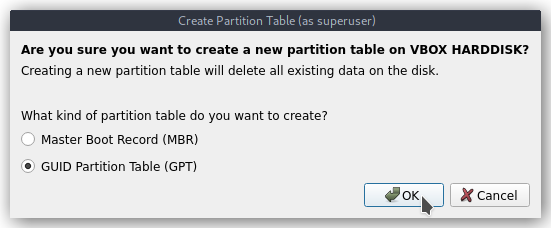
A dialog window will appear asking for the partition table type. Keep the default value (GPT) for modern UEFI systems and click OK.
Select the Free Space and click Create.
Now we will create the necessary partitions manually.
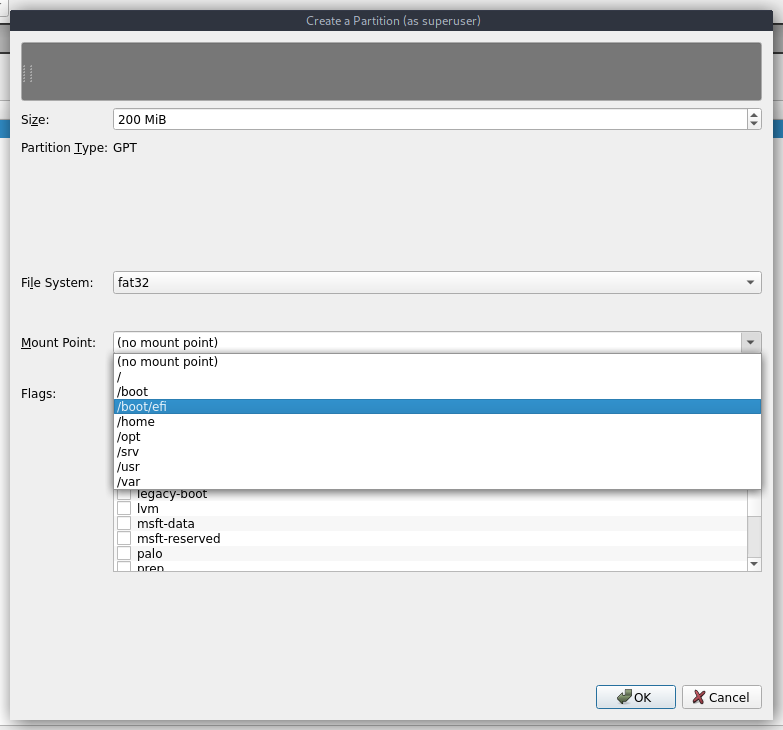
1. Create the EFI Partition (/boot/EFI)
- Mount Point: Select
/boot/EFI - File System: Select
fat32 - Size:
200MiB(Recommended: 512MiB for multi-boot systems) - Click OK.
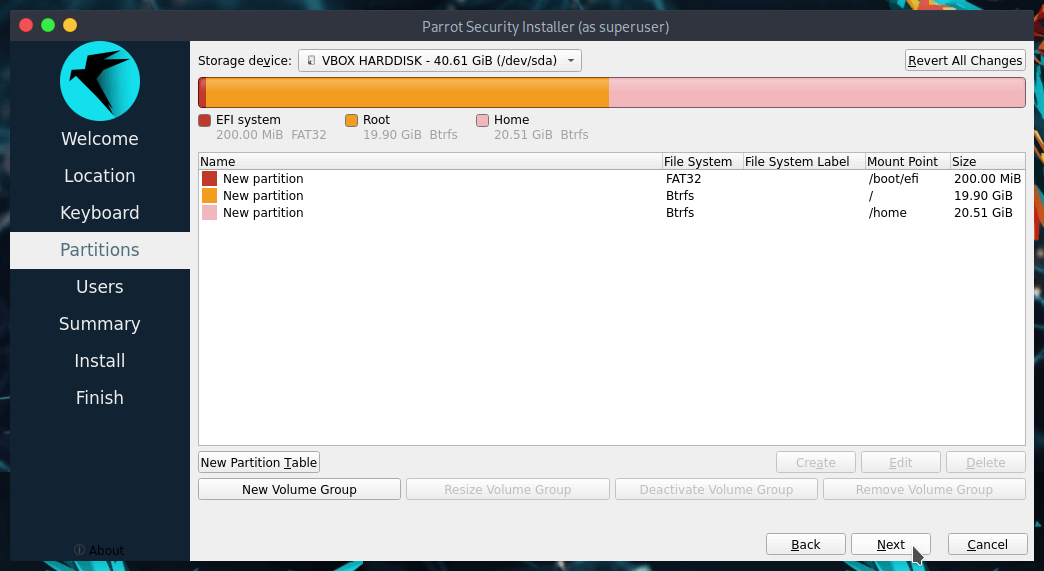
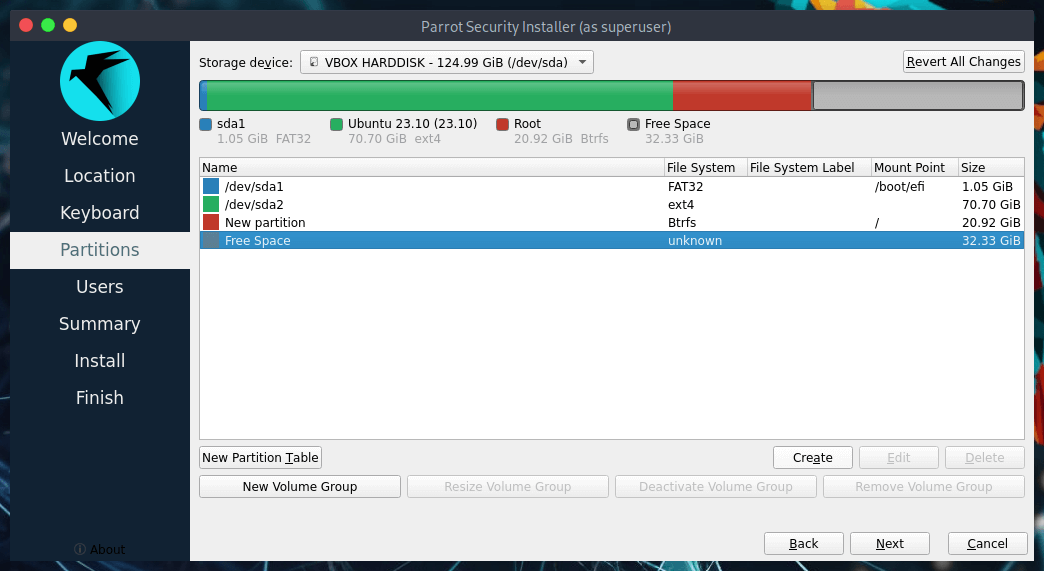
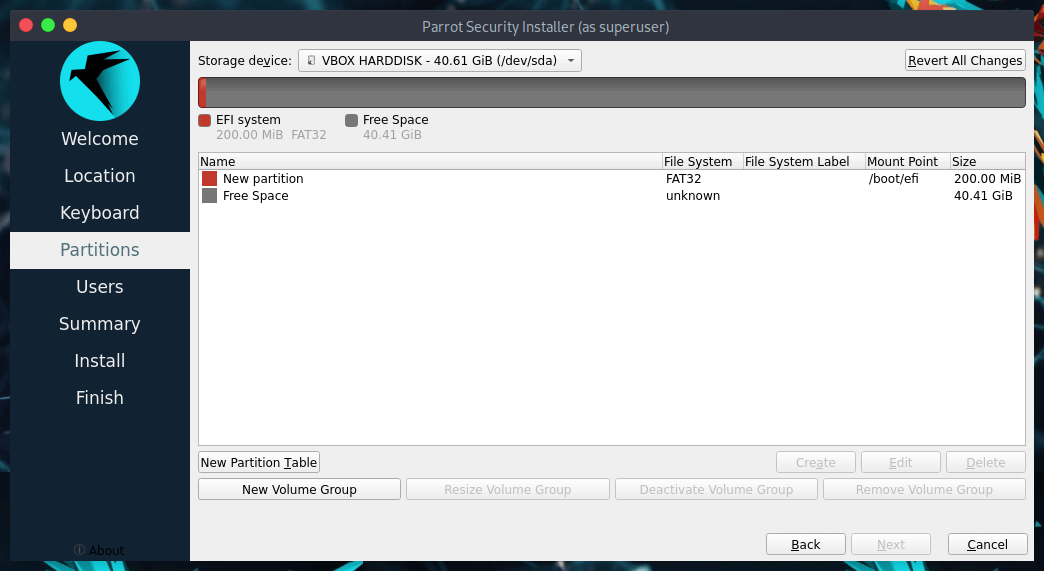
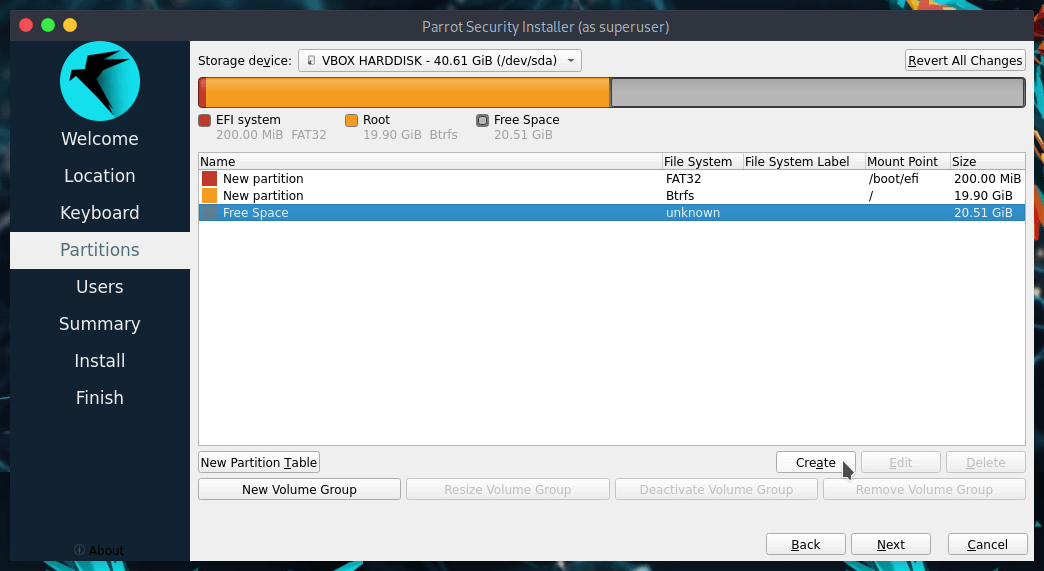
Your partition table should now look like this:
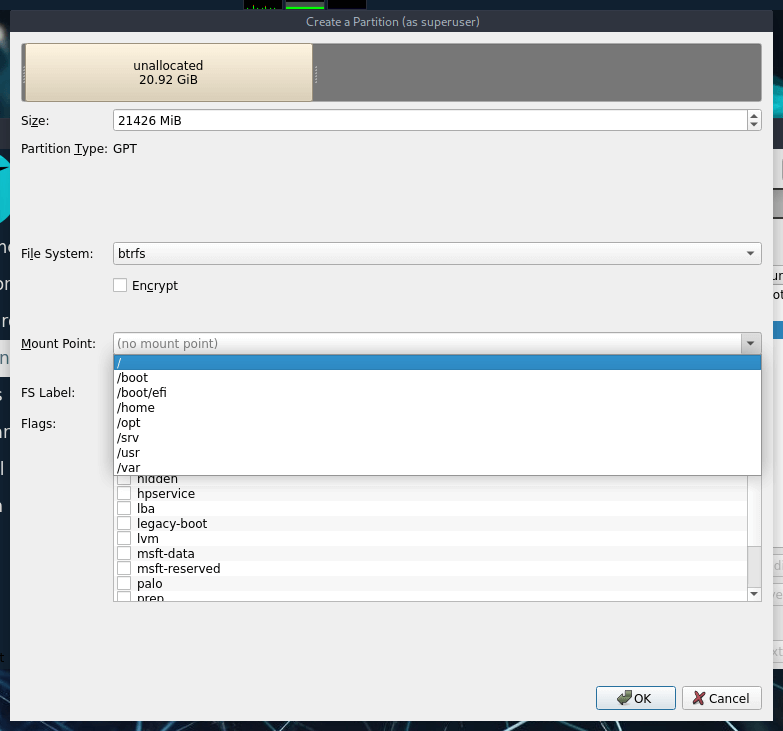
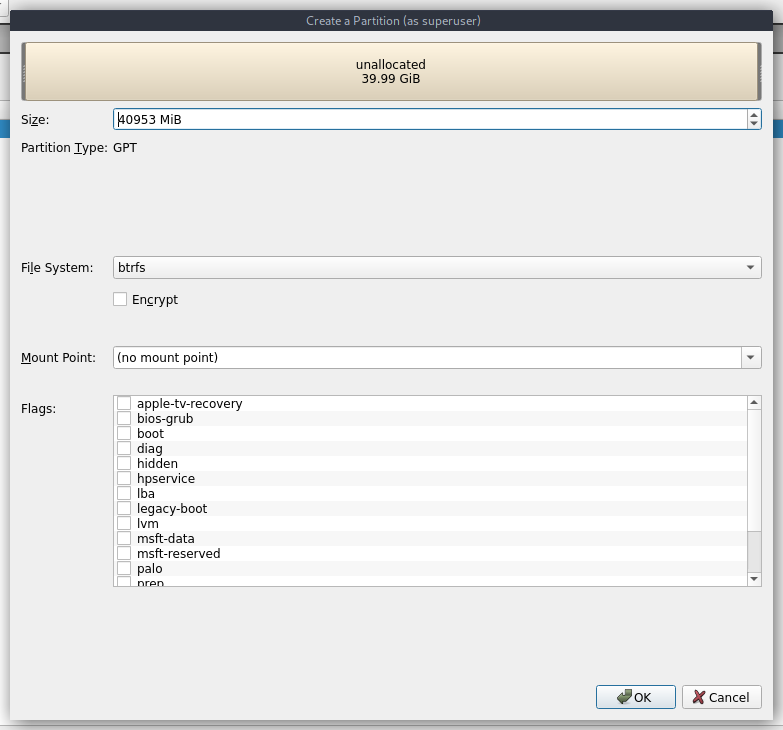
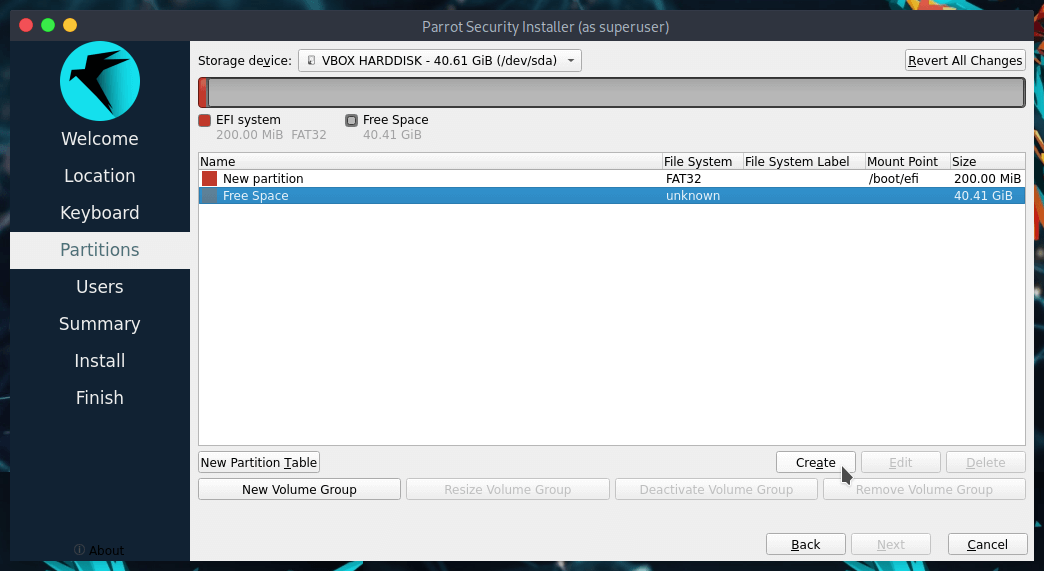
2. Create the Root Partition (/)
Select the Free Space again and click Create.
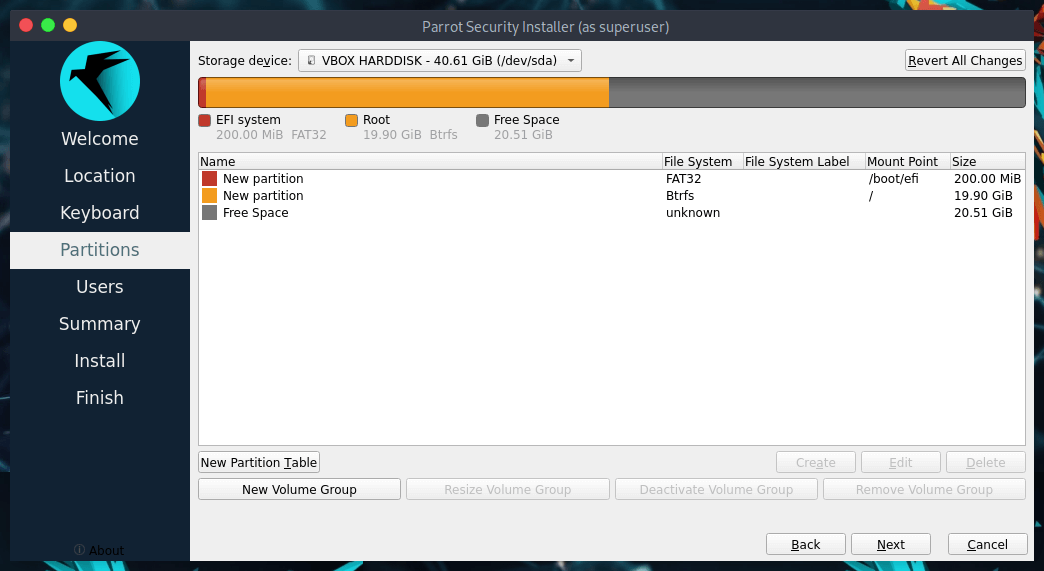
Configure the root partition:
- Size: Allocate appropriate space (e.g., 20753MiB in this example).
- File System:
btrfs(or ext4). - Mount Point:
/ - Click OK.
Remember the minimum requirements: 20GB for Home Edition, 40GB for Security Edition.

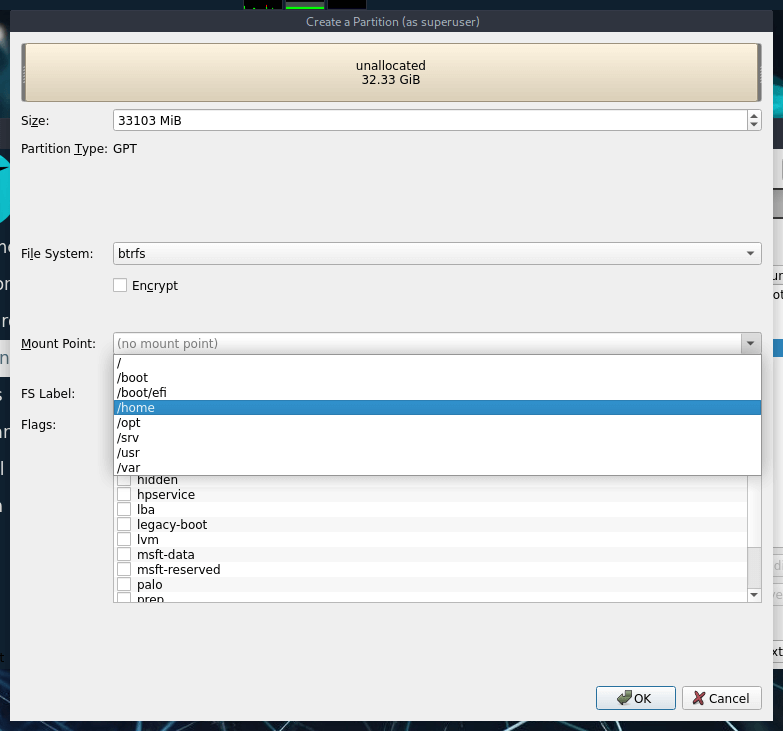
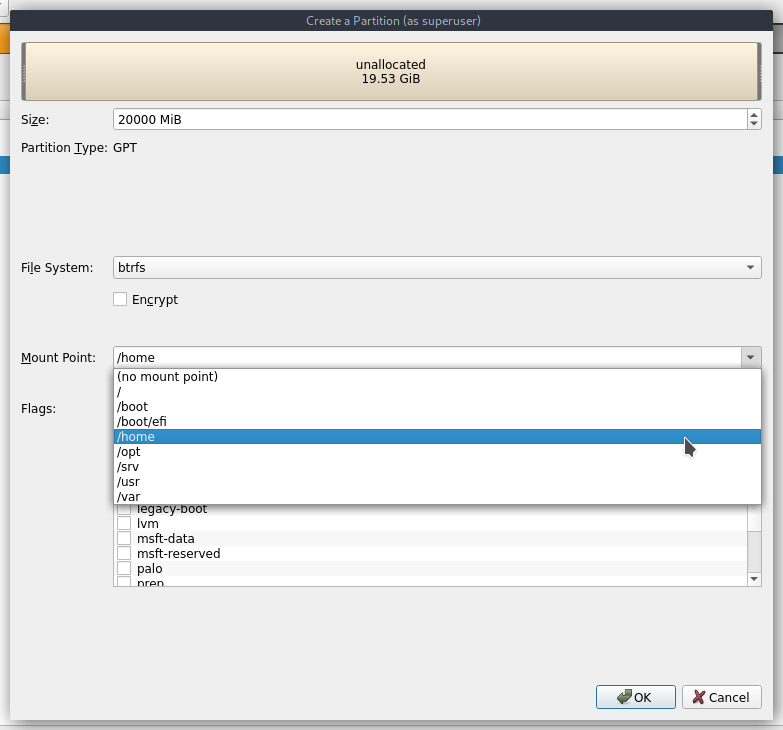
3. Create the Home Partition (/home)
The partition table is almost complete. Let's use the remaining space for user data.
Select the remaining Free Space and click Create.
Configure the home partition:
- File System:
btrfs(or ext4). - Mount Point:
/home - Click OK.
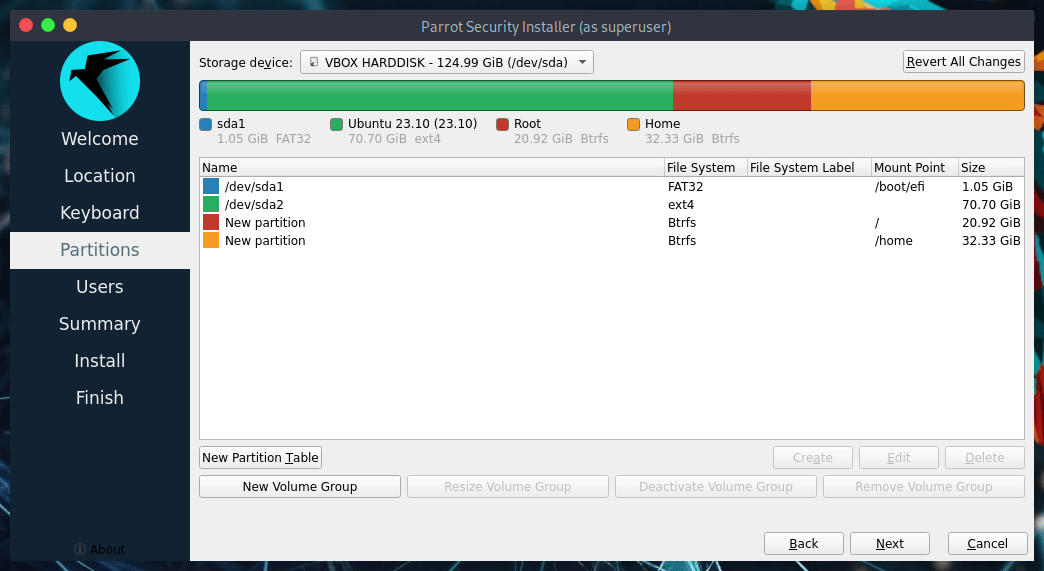
With partitioning completed, click Next to proceed with the installation.